![]()
![]()

![]()
|
|
|
|
Have you ever noticed some streetcars trying to launch off the line at a run-what-you-bring meeting, fighting for traction with the rear wheels bouncing up and down? I am sure you have, though you may not have realised what physical forces had conspired together to make a Bug leave the line like a pogo stick on wheels. You see, VW’s have fundamental flaw in their chassis design when it comes to hard launches: the frame horns. They may well be perfectly adequate for a stocker. But suspended from the floor pan, with no support at the gearbox cradle end, they flex up and down like elastic when subjected to launches, causing the dreaded wheel hop. This kills ET’s (Elapsed Time) and gearbox alike. Fear not though, as Custom speed parts in Germany has answered: CSP torque Bar, which eliminates frame horn flex once and for all. These clever German Guys have thought this problem through and came up with a clever solution. Their idea is to use existing chassis points and tie them together to form a trapezoid shape – a shape which is one of the strongest possible. The kit not only functions in true Germanic style, it also looks the badger’s nadgers in aircraft-quality ally.
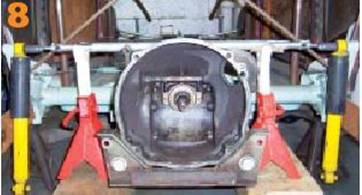
The car used for this feature is a 1956 racecar project.
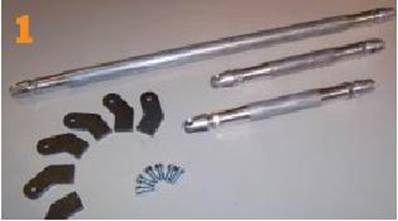
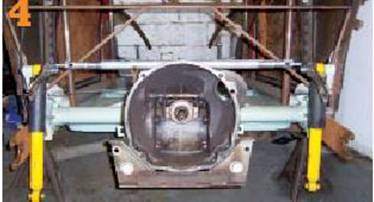
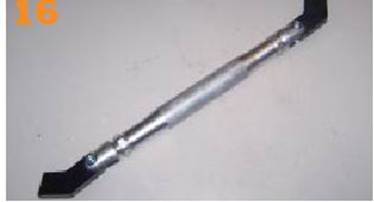
Here’s a shot of the major components of the Custom Speed Parts Kit. It is designed to be welded in site with all of the major components in place (engine and gearbox assembly) so that clearance problems do not arise.
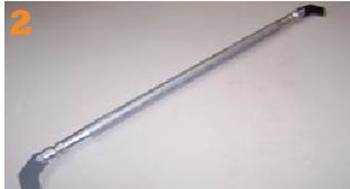
The first job on the list is to attach the laser-cut steel brackets to the end of the main torque bar. Insert the brackets into each end of the bar and fasten the Allen screw lightly so that the bracket can still move with a little force.
assuming you have jacked up your vehicle, secured it on axle stands and removed the road wheels, you then need to remove your original shock bolts and replace with CSP’s new bolts and bracket tube. Tighten the nut and bolt.
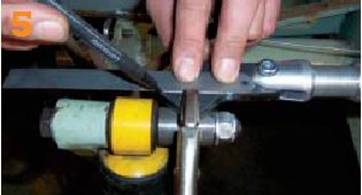
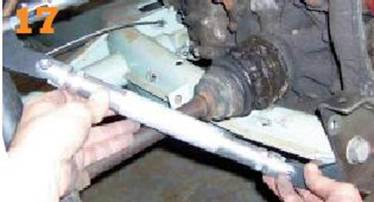
Offer up the main bar to the vehicle. You will need to adjust the left- and right- hand threads to lengthen or shorten the bar. The brackets need to meet the tubes on the shock bolts squarely.
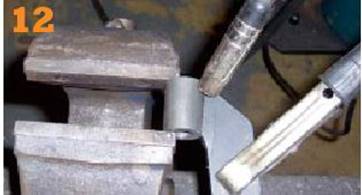
Because the kit is primarily designed for post-Oval- window cars, the main torque bar brackets need to be modified. It was necessary to mark where the brackets meet the tube. There is no need to do this on later cars, though.
It is then necessary to transfer both brackets to a vice and cut to the line with a hacksaw. This won’t be necessary on later cars, as the bracket will meet the tube perfectly (early cars have straight shock tower brackets).
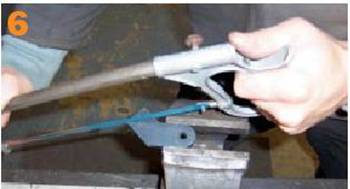
Once the bracket is cut, it’s good engineering practice to clean the area to be welded back to bare metal. With the black carbon coating removed, the welder is able to strike his arc far more cleanly, which is good.
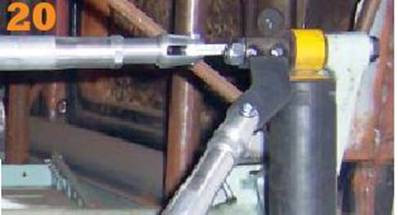
Offer up the main torque bar prior to tack welding tha brackets to the tube. A pair of axle stands and blocks of wood will help support the torque bar. Aim to get the torque bar parallel with the torsion bar tube. Take your time.
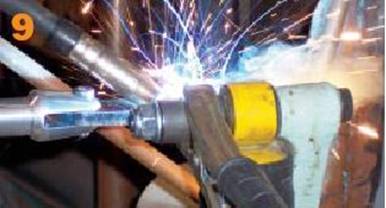
Once you are happy that all is square and that the brackets meet the shock bolt tubes, you can tack weld the brackets to the tube on both sides. Make sure the welder has a good earth and that the battery is disconnected.
Here’s a bird’s –eye view of the bracket tack welded with two spots to the shock tube piece. A couple of good tack welds with a MIG welder (TIG is even better) will be sufficient.
With both brackets tack welded to the tube pieces, it is now necessary to undo the shock bolts and remove the bracket so that it can be welded on the bench. This makes life easier, as welding on the car will be restricted.
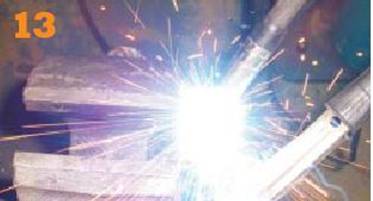
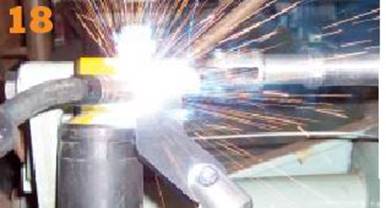
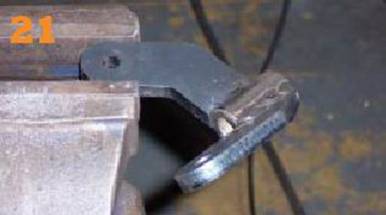
Transfer the bracket to the bench-mounted vice. Remember to get a decent earth and crank up the amps on the welding set for good penetration. if you haven’t welded thick gauge before, I suggest you practice on scrap bits first.
Try to get a nice, clean, strong penetrated weld.
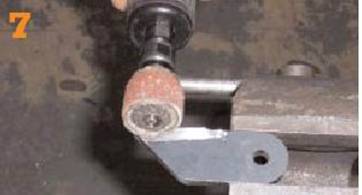
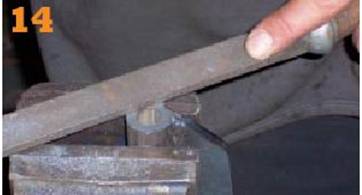
It is quite likely that the edges of the weld may interfere with the tube face surface. If this is the case, it will be necessary to file the tube flat again, otherwise the mating surfaces will be crooked, causing interference.
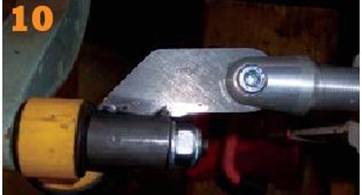
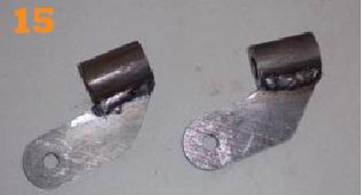
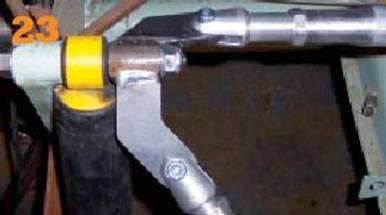
Here is a shot of the pair of main torque bar brackets ready for paint.
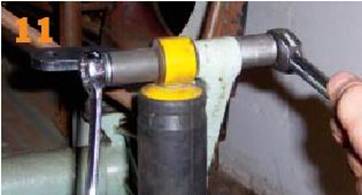
Next, assemble the two shorter torque tubes with their bracket counterparts. Loosen off the lock nuts so that the ends can be wound in or out. This is important for setting the lengths while offering up the tube to the chassis.
It is a matter of personal preference whether the lower bracket gets welded to the chassis frame horns or, in my case, the heavy-duty gearbox cradle. I wouldn’t advise welding the brackets to the stock gearbox cradle, though.
Ponce you are sure that you are happy with where the tube sits and that it clears all of the major suspension components and exhaust, you can tack weld the brackets on. Remember, two good quality tack welds is enough.
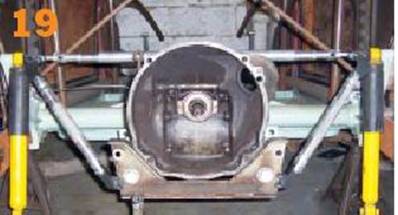
Here’s a shot of the torque bar brackets tack welded into place for reference. Because this is an early car, the shock mount bracket angles will be different to later cars. Notice how the top tube is parallel to the torsion tube.
The next stage is to undo both the top and lower torque bars and undo the shock mount nuts in order to remove the brackets. Note later cars will have a complete different bracket angle to early cars like mine.
Nearly there. Secure the bracket in a vice and make sure you have a good earth. The amount of amps necessary to weld heavy- gauge steel is considerable, so a good earth is vital to the continuity of the electricity.
Take your time and make sure you are comfortable with welding heavy gauge steel. A good quality penetrative weld is essential for the integrity of the kit. Ideally, your welding set should be rated at 160 a or more.
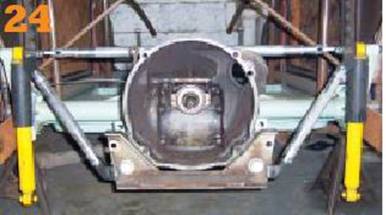
With both brackets welded up nicely and the lower brackets welded to either the frame horns or your heavy – duty gearbox hanger, it is time to bolt on the complete kit for a trial run. Use a little oil on the ally threads and lock nuts.
Finally finished. With the torque bars in place and the bars adjusted so that they are just snug, the whole rear end is super stable. Frame horn flex is now a thing of the past and hard launches are a go go. |
|
Send mail to
eagleeye@searchmalta.com with
questions or comments about this web site.
|