
![]()
![]()

![]()
|
|
|
|
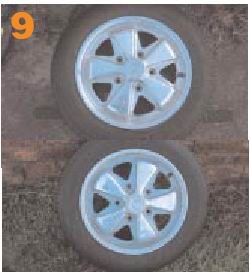
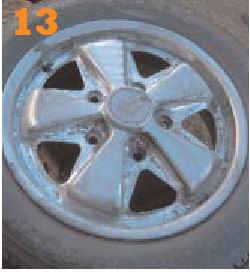
These Fuchs alloys would once have looked spanking on a show car but have since been bit mistreated and now look more than a little worse for wear. The paint was flaking and the once-polished areas were very flat and dulled – time for a revamp!
There’s no denying that a set of polished alloy wheels, especially something like the Porsche Fuchs alloys, look stunning on a well-built VW. From the factory, these wheels had a kind of anodising coating that looked good but just doesn’t shine like polished wheel. While the anodised look is perfect for a subtle streetcar, most VW owners are looking for a bit more sparkle – hence the polishing. Removing the anodised finish is the hard part, as, although paint-stripper will remove black paint, the silver finish won’t budge. This is really a job for the professional polisher but we’ve shown you how to remove it by hand – if you have the time and stamina – in step 15. The problem we’re going to deal with is that a polished wheel in daily use can soon look dull and flat, and will often end up kerbed or scratched at some point. Winter road salt, brake dust and oxidation are the problems we have to deal with, and you might find your wheels need polishing every week to keep them looking perfect. Be warned, magnesium alloys like BRMs or Mahle alloys will dull even quicker. Peek or Autosol are ideal types of metal polish to refresh your wheels, as they are mildly abrasive and will return the lust re to flat, bare alloy. The real problem starts when you let the wheels get too bad. These rims had been left unpolished for far too long and the oxidation had marked the spokes quite badly. Also they had been re-detailed in black at some point and this was beginning to flake off in places.
Why not clear lacquer the finish to preserve the lustre? We’ve found from experience that a clear lacquer will dull the finish a bit straight away and the slightest chip or scrape will allow moisture under the surface, causing flaking and oxidation after a short period of time. If this happens you’re into stripping all the lacquer off and starting again, that’s why we’ve decided to stick with the bare finish.
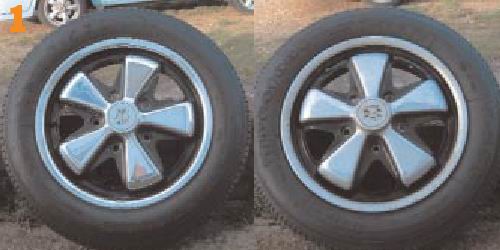
Here’s what we’re starting with-an odd pair of 4.5x15inch Porsche Fuchs wheels. One has been fully polished before it was detailed, while the other is only partly polished (spokes and rims). Both were detail-painted in black at the same time, but both are looking worn and scruffy after a few years of hard road use. Although the part polished wheel on the right looks dull on the spokes, it’s in no worse shape than the polished wheel – the shiny one just got a pre-buff before we decided to re-detail them. Partway through the polishing, we got hold of another original wheel with anodising. To find out how we matched that one to the part polished wheel, follow from step 15.
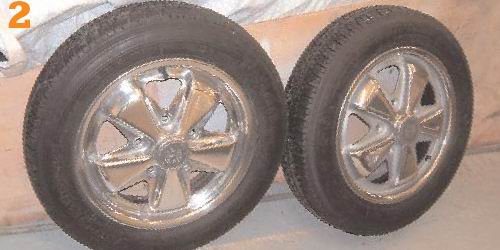
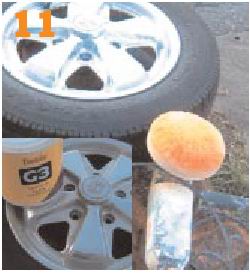
Just to give you an idea of what they looked like with paint removed and then polished up, here’s how they turned out! The other original anodised wheel shown at the end of the feature has since been matched to a part-polished rim (polished spokes and rim) and they will be detailed as a pair. The fully polished wheel is now a spare wheel for another car with a set of fully polished rims all-around.
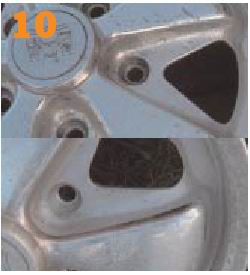
Here’s the main problem – flaking paint. After several years of road use, the wheels were showing signs of deterioration. This is a problem with many polished wheels.
Add to this the fact that the polished surfaces had started to corrode and things weren’t looking so hot. Most of the corrosion would polish off with a mild abrasive polish but while we’re redoing the paintwork, we might as well polish properly.
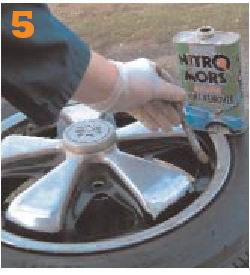
Rather than have the wheel blasted, we thought Nitromors paint stripper might work well and we were right! Remember, these wheels have previously been polished and repainted – if yours have the original factory anodising, go to step 15.
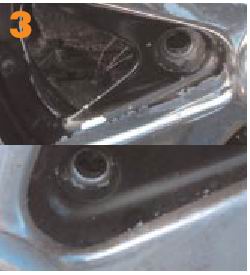
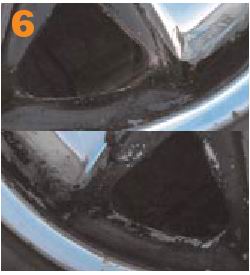
As you can see, Nitromors got to work almost straight away. The top picture was taken a couple of minutes after application and a quick recoat left us with the lower picture after about five minutes. Try not to get paint-stripper on your skin –wear rubber gloves and apply with a brush.
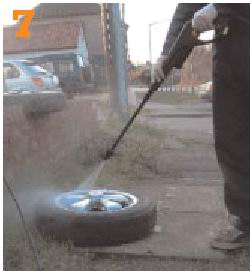
When the paint is all bubbled and pulls away from the alloy easily, you need to neutralise the paint stripper with water, otherwise you’ll never get fresh paint to stick! We decided to jet wash away the old paint stripper along with flaking paint. Wear goggles when jetting , as it goes everywhere!
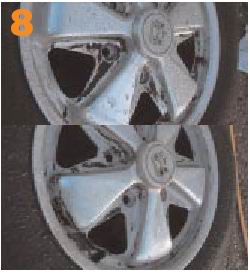
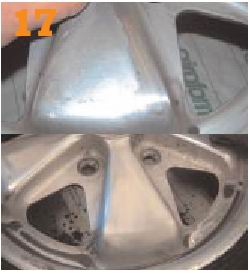
Here’s what we were left with. As you can see, most of the paint has come away but there is still a fair amount left on the wheels. The remaining paint came away easily when we picked gently with a screwdriver, but we had spare paint stripper, so we recoated the wheels and jetted them off.
his time it stripped every trace of paint right back to the bare alloy. It is now easy to see that the top wheel has been fully polished while the lower wheel has just the spokes and rims polished. Remaining ‘grey’ areas have to be rough finished and still have some factory anodising on the surface.
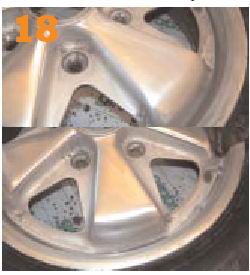
Up close, you can get a better idea of what we’re talking about. The top wheel has been carefully sanded and polished everywhere, while the lower wheel still looks rough below the paint. There’s a bit of work to do on the sides of the spokes where some paint remains and the finish is cast.
If you have access to a power polisher, buffing the spokes and rims is relatively easy. Iof you do not skip to step 14 and prepare to put in some muscle work! We used an old foam mop head that had previously been worn out from polishing paintwork. A cotton buff would have been better.
There are specialist polishing soaps available for this job but5 we found Farecla coarse G£ followed by finer G7 worked a treat. We tried T-Cut, too, but it made a little difference to the finish. G3 is a polishing compound for use with power buffers.
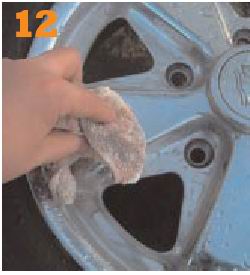
We were careful not to press too hard or catch any edges of the tyre – ideally, this should be removed! Keeping the wheel face moist helped a lot and we worked on one spoke at a time until there was a nice, even buffed finish everywhere.
Wash off the excess polishing compound and the wheels should look better already. Now it’s time for the hand polishing – very time consuming. The biggest bonus is that the areas the buffer wouldn’t reach are easy to get to with a rag.
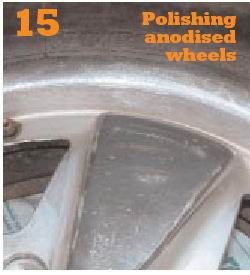
We decided to keep the fully polished wheel as a spare and polish this factory finished anodised wheel to match the partially polished rim we already had. As you can see, this 1967 wheel had seen plenty of use and had some deep scratches and scuffs. First, we need the anodising removed.
Other than blasting, hand sanding or coarse buffing is the only way to remove the factory finish; paint stripper doesn’t touch it. A sneaky tip is that heavy duty oven cleaner will eventually remove anodising, but we decided to play it safe and stick to what we know – sandpaper!
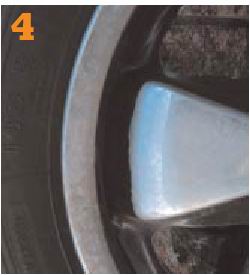
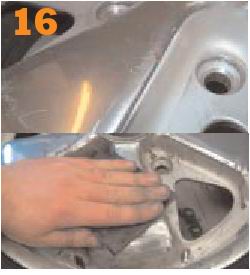
We used wet and dry paper to sand back the surface and started with 400 grit. For the deeply scratched, scuffed and damaged areas, we used a piece of worn 240grit followed by the 400. The top picture shows the bare alloy underneath the factory surface. Bottom picture is fully sanded.
After the 400 grit, we cleaned the spoke down and redid the whole thing in 800 grit paper (wet of course!). This, in turn was cleaned down before the whole process was re done with 1200grit and, finally 1500 grit papers. This is a very slow job – this one spoke took almost two hours to get right!
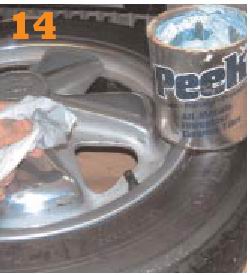
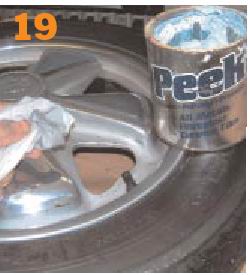
Once the 1500 stage is complete, you should have a smooth but dull surface with a nice, even finish and no visible scratches or marks. Now you can go to work with Peek or Autosol abrasive cutting polish. T-cut will work, or even Brasso, but we found Peek worked quickly.
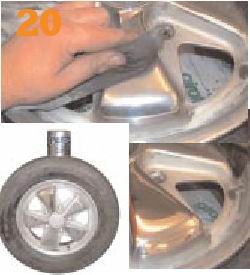
Vigorous polishing should black your polishing rag, but that’s a good thing, as it buffs the surface. Keep at it until the polish is buffed away before re-buffing with a clean, dry rag. You should now have a perfect finish! OK, two hours gone and only one spoke finished – four spokes and the rim to go….
|
Send mail to
eagleeye@searchmalta.com with
questions or comments about this web site.
|